Fencing is a good option for adding privacy and security to your garden and with Spring on its way, it’s a good time to stop and take stock of your garden plans for the seasons ahead. Dependent upon budget, purpose and size, the variety of fence panels available is plentiful and choosing the right fit for your garden can be a struggle, however, here at eDecks we like to make things as simple as possible for our customers, and we will equip you with the knowledge you need to make a decision on what works best for you.
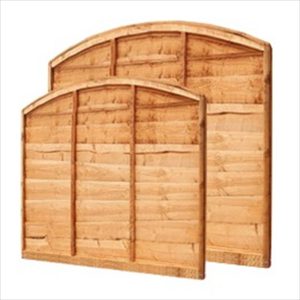
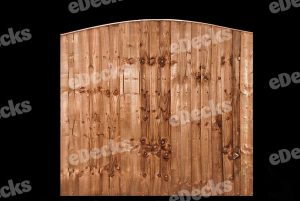
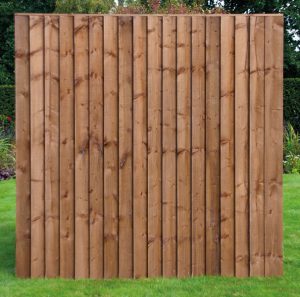
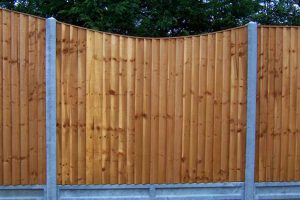
If you would prefer a heavier duty fence panel, then vertilap fencing is the best way to go. The design means that each wooden board covers part of the next and so allows no light through yet creates a very private fencing area, as well as adding strength to the fencing panel. The added strength is excellent for security, but also helps if you or your neighbours has pets, so that they stay on the correct side of the fence. They are available in both vertical and horizontal overlaps, some boasting heavy duty boards and even made to measure.
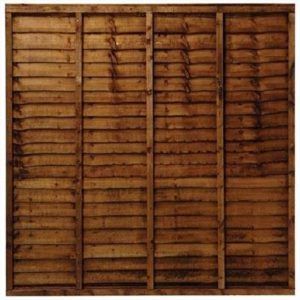
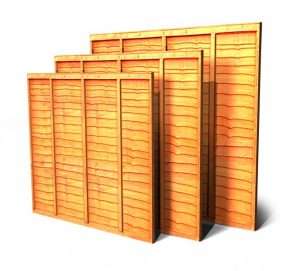
If you are on a budget, overlap fence panels are a common and wallet-friendly solution. Whilst these panels are not quite as strong as alternatives such as vertical lap panels, they are super easy to install, as well as being inexpensive whilst still providing your garden with privacy. With our handy guide below you can install your very own garden fencing area!
- 1: Ask the Neighbours – Every new fencing project should begin with consulting your neighbours; this has as much to do with keeping good relations as it does practicality as constructing a new fence is always easier to do if you have access to it at both sides.
- 2: Pick a Type – It is important to find the right type of fencing for your garden, and here at eDecks we offer a wide range to choose from so it is worth considering what you are wanting from your fence before making a decision. Overlap fence panels are constructed from overlapping horizontal boards and offer high levels of privacy at a very good price, with heavy duty vertilap being the strongest fence panels, offering a perimeter fencing that is very sturdy with a high privacy level. To calculate how many fence panels to buy, start by measuring the area that you want to cover. Since fence panels are usually 6ft wide, you need to divide the length of ground by six to calculate how many panels you will need. For example, an area of 30ft would require 5 panels.
- 3: Post It – With your fence panel designs taken care of, it is time to then get started installing the fence posts. Steel fence posts are by far the more sturdy option in comparison to wooden fence posts, but they do require more effort to put up. Timber posts on the other hand, are relatively easy to erect so they’re perfect if this is your first time building a fence. If you are using timber posts, we do recommend extending their lifespan by using a wood preserver of your choice.
- 4: Supporting Cast – Next up, you will need to set the posts in using concrete or steel fence supports to keep them in place. Both methods are good options for securing your posts in the ground, although if you choose to set your posts in concrete, you will require longer fence posts. For a six foot high fence, you will need eight foot long posts, as they will need to be buried at least two feet deep. If you are using steel supports, then these can be the same as the fence panel length.
- 5: Let’s Prep – Begin preparation by marking the line your fence will follow with string, attaching it to posts along the boundary line. Any climbing plants or dense grass should also be cut away to allow easy access to the area.
- 6: Diggin’ It – If you are using wooden posts, make sure the holes are at least two feet deep; any shallower and your fence will become wobbly during strong winds. Using your boundary string line as a guide, dig holes at both ends of the line, aiming for holes that are three times wider than the width of the posts. For example, if your post is 4x4inches, dig a hole 12x12inches wide. This will ensure the concrete foundation will be sturdy enough to secure your posts. Mark an 8ft scrap of timber two feet above the bottom to make sure that the depth of the holes are correct and if the mark lines up with the ground, your postholes are deep enough. If you are using steel fence supports, place a piece of scrap timber into the support and hammer that into the ground until the top of the steel support is level with the ground.
- 7: Set in their Ways – If you are using steel supports, you will not need to worry about securing your posts in the ground, but if you are using wooden posts, you will need to set concrete around them to hold them in place. Once the first and last postholes are ready, position your post and ask a friend to hold it in place. You can mix your own concrete if you prefer, but a 1kg Postcrete mix will work just as well. The Postcrete mix will set in just a few minutes so ensure that your posts are straight using a spirit level. Slope the concrete away from the post using a trowel to get the water to run away from the base of your posts. Next, attach a new line of string on the top of your bookending posts to make sure the other posts line up correctly all along the boundary. You can also use this line to quickly check that the heights of your posts are correct too. With the line in place, you are then ready to continue digging the other holes if you haven’t already done so. Measure out and mark the position of the holes by placing the fence panels against the first post.
- 8: Putting up the Panels – Now that the posts are in place, nail the post clips to the fence post first and then onto the fence panel. Two or three U-shaped clips per post will be enough to hold the panel in place. Keep the base of your panels from rotting and installing gravel boards. You can protect the top of your posts by using a decorative post cap. Prevent the cap from splitting by drilling a hole into the cap before you attach it to the post.
eDecks offers some of the best deals on maintenance-free Overlap and Vertilap Fence Panels around, including all of the installation supplies and tools you may need. Not only do we provide plenty of unbeatable deals but also:
Super-fast FREE delivery on orders over £100*
Handy FREE installation guides.
*Free delivery applies to most of the UK, but some areas may incur a charge. Please check the eDecks website for more details.
10 Year Guarantee against rotting! *Provided all products have been fitted and maintained to the manufacturer’s recommendations. *


Thanks for the article, quick question I have heard of fencing that is made from recycled plastic and made to look like wood. Is this type of fencing reliable or would it be prone to bending or warping and or fading in sunlight?
Hi Joan, Composite fencing is made from recycled plastic and wood. To give the appearance of real wood but this does not need staining, painting or sealing. This product is extremely strong while also being lightweight and easy to cut. check out our composite fence panels here for more details.
I am continually searching online for tips that can benefit me. Thx!
Great article. We are always looking for new suppliers of fencing and decking. Do you have a brochure?
If so please email it to me.
Thanks
Great Information. Thanks for sharing.